
I have been cold camping exactly one time in my life. One time too many. It was a September trip to the Cascades, low forties overnight, and I had borrowed a bag rated to 40F thinking that would be fine. By 2am I was awake, curled into a ball, counting down to sunrise. I was not cold because the bag was bad. I was cold because I had done everything else wrong: no sleeping pad, cotton base layer, campsite right in a wind channel, and zero food before bed. Since then I have learned, trip by trip, that staying warm at camp is not one thing you get right. It is a system of maybe nine things, and when they all click together you sleep straight through to morning no matter what the thermometer says outside.
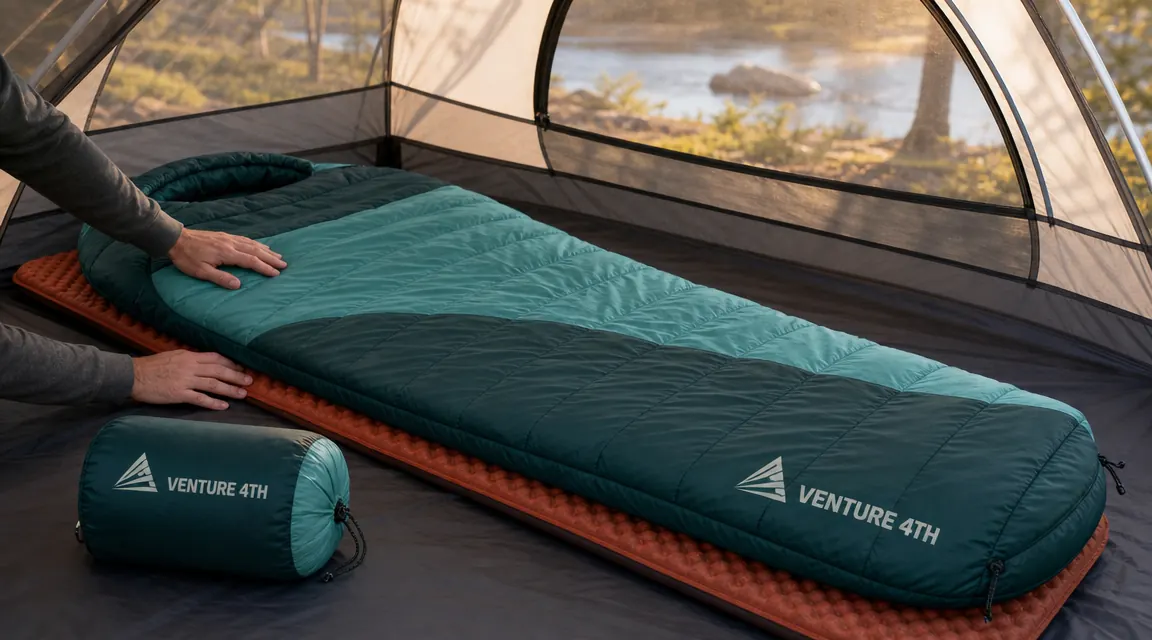
The good news is that the system is not complicated or expensive. The VENTURE 4TH 3-season mummy sleeping bag is the anchor piece I recommend to most people starting out. It is rated to 32F, packs down to about the size of a football, and has over 6,000 ratings on Amazon sitting at 4.6 stars. But even the best bag in the world will not save you if the rest of the system is broken. Read through all nine steps before you head out.
If cold nights have been ruining your trips, a proper 3-season mummy bag is the fastest fix.
The VENTURE 4TH sleeping bag is rated to 32F, weighs under 3 lbs, and compresses to a size that fits inside most daypacks. Over 6,000 campers have tested it across three seasons. Check today's price before your next trip.
Amazon Check Today's Price on Amazon →Step 1: Match Your Bag Rating to Real Overnight Temperatures
A sleeping bag's temperature rating is the lowest temperature at which a standard adult male will survive the night without hypothermia. It is not the temperature at which you will sleep comfortably. Most people, especially smaller-framed adults and women, need a bag rated 10 to 15 degrees lower than the actual overnight low to sleep well. If the overnight forecast says 38F, you want a bag rated to the mid-twenties for comfortable sleep, or a 32F bag with a liner and some strategic layering.
The VENTURE 4TH mummy bag I carry is rated to 32F. On nights that drop to 38F or 40F I am perfectly comfortable without any extra layers in the bag. When it dips into the high twenties I add a thin fleece mid-layer and I am still fine. Know your weather window before you pack. Do not guess at conditions and bring a summer bag into late-September mountain country.
One more thing on ratings: EN/ISO testing became the industry standard for European brands, but many budget bags still use proprietary ratings that skew warm. Check whether the bag was tested under EN 13537 or ISO 23537 standards. A bag that lists a 32F rating with no testing standard noted is giving you a guess, not a guarantee. The VENTURE 4TH lists its comfort and lower-limit temperatures, which gives you something to actually work with when trip planning.
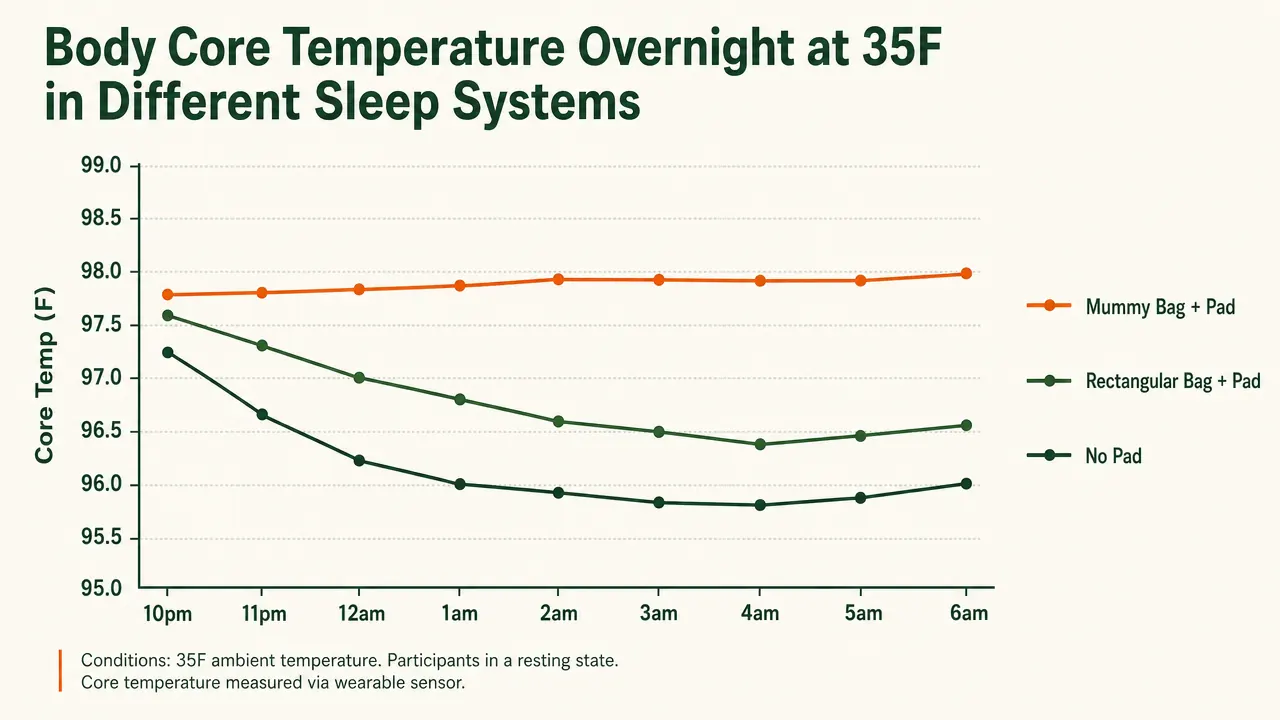
Step 2: Insulate From Below Before You Worry About Above
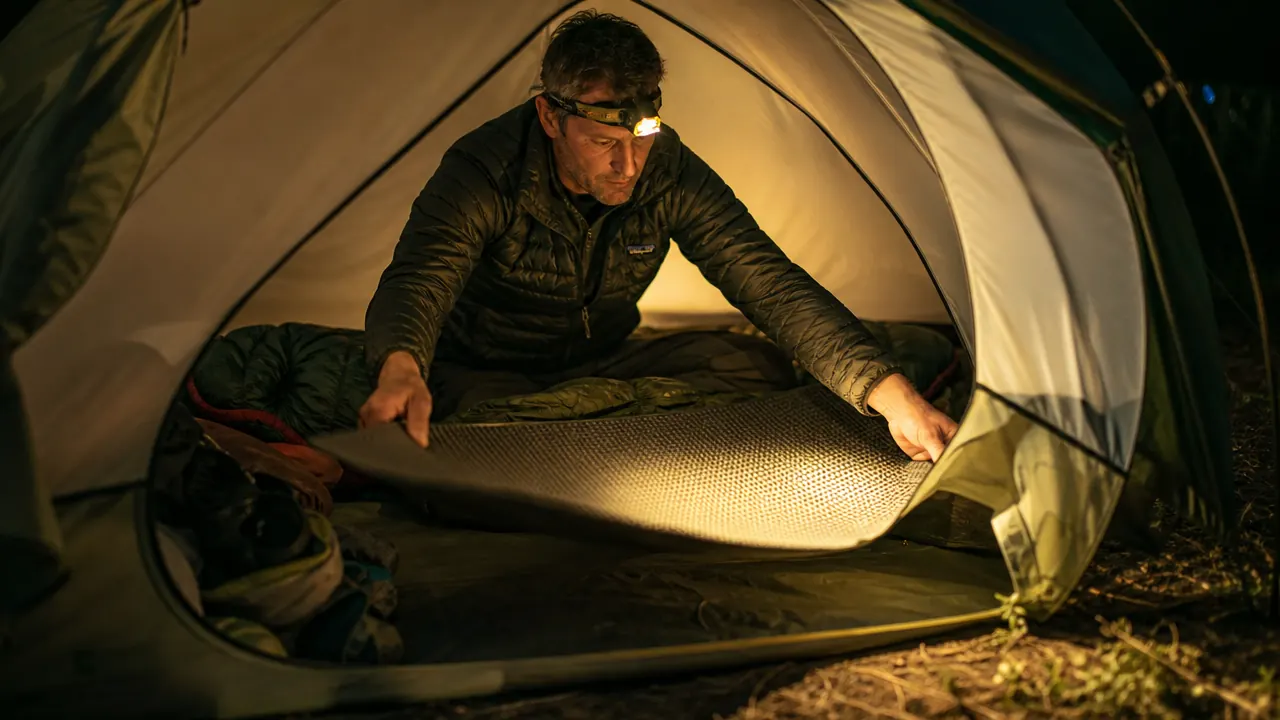
The ground is a heat sink. Your sleeping bag is designed to trap the warm air your body generates, but when you compress the insulation underneath you by lying on it, that layer stops working. You lose heat straight into the dirt or the tent floor, and no sleeping bag in the world can compensate for that. The fix is a sleeping pad with an adequate R-value.
For three-season camping in temperatures above 20F, you need a pad with an R-value of at least 3. A standard foam sit pad has an R-value around 1 to 1.5. A basic inflatable pad like the Thermarest NeoAir or similar runs between R-2 and R-4 depending on the model. If you are doing winter camping or high-altitude trips, push to R-4 or higher. Stacking a cheap foam pad under an inflatable is a simple way to add insulation without buying a new pad. I used that trick for years before I invested in a purpose-built four-season pad.
Step 3: Layer Your Clothing Correctly Before Getting In the Bag
Most people either get into their sleeping bag in the clothes they wore all day, or they strip to nothing thinking the bag will handle everything. Neither approach is right for cold nights. The correct layering system for sleeping is: moisture-wicking base layer against the skin, a light insulating mid-layer on top of that, dry socks, and a hat. That is it. You do not want so many layers that you cannot move or circulate heat inside the bag, but you want enough that your body is not wasting energy heating empty air inside the insulation.
The key word is dry. Wet base layers will make you cold faster than no base layer at all. Change out of whatever you hiked in, especially if you sweated during the day. Cotton holds moisture and stays wet against your skin all night. Merino wool or synthetic base layers wick and dry fast. I keep a dedicated sleep set in a dry bag inside my pack and I never use it for anything else on the trail.
Wet cotton against your skin at 2am will undo every other thing you did right. Dry synthetic or merino base layers are the single cheapest upgrade most campers are missing.
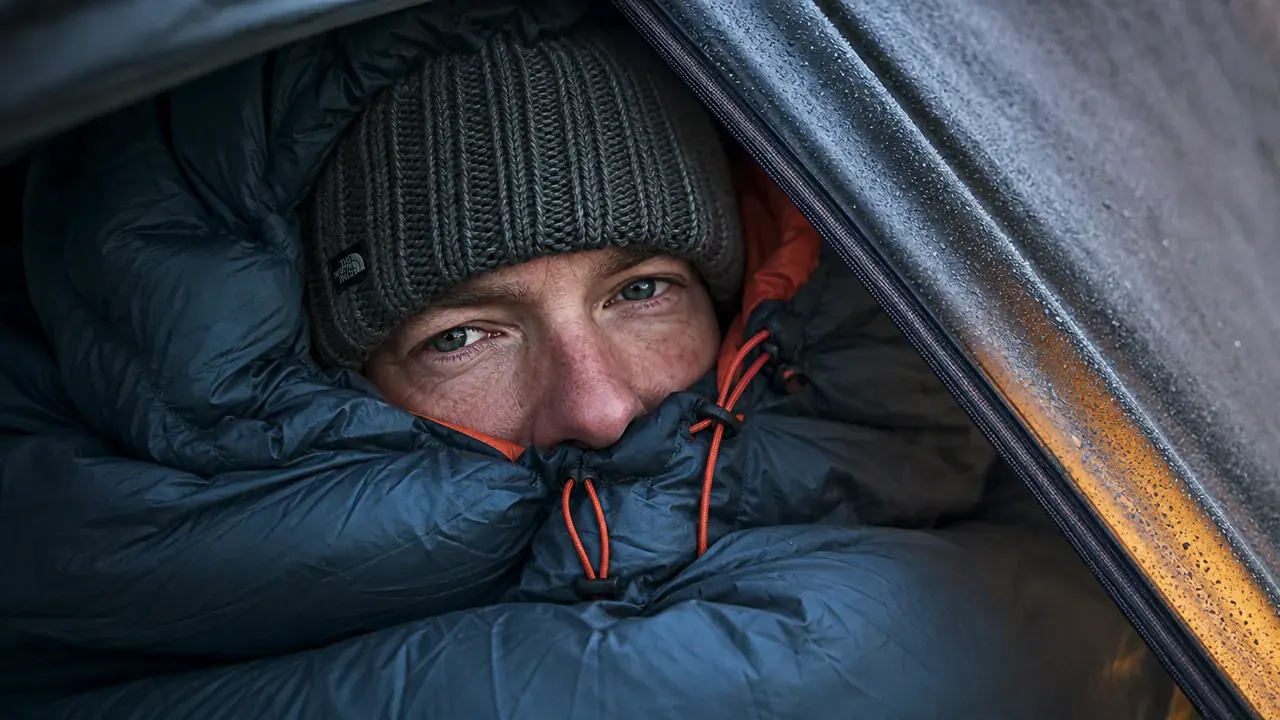
Step 4: Use the Hood and Cinch It Down
A mummy bag's insulated hood is not decoration. You lose a significant portion of your body heat through your head, neck, and shoulders. When temperatures drop, pull the hood up and cinch the drawstring so only your face is exposed. Most people I see at campsites leave the hood flopped open like they are sleeping in a rectangular bag. That is a lot of warmth escaping into the tent all night.
The VENTURE 4TH mummy bag has a contoured hood with a simple drawcord. Takes about five seconds to cinch. On cold nights I leave only my nose and mouth outside the bag. Your breath will humidify the inside of the bag over time, which is why I also recommend airing it out for thirty minutes in the morning whenever possible rather than stuffing it back into the sack immediately.
Step 5: Put a Hot Water Bottle at Your Feet Before You Climb In
This is the oldest trick in the book and it still works better than most people expect. Before bed, boil water with your camp stove, fill a Nalgene or metal water bottle, wrap it in a fleece or wool sock to protect against burns, and put it at the foot of your sleeping bag ten minutes before you get in. By the time you slide in, the foot box is already warm. Your body does not have to waste energy heating dead air, and you fall asleep faster and more comfortably.
By morning the water is still warm enough to drink or use for coffee. I have used this trick down to 20F and it makes a meaningful difference. If you are going light and do not want to carry a Nalgene, any wide-mouth metal water bottle with a leak-proof lid does the same job. Just make sure it is fully sealed. A wet sleeping bag in cold weather is a miserable and potentially dangerous situation.
Step 6: Eat a Substantial Snack Right Before Sleeping
Your body runs on fuel. When you sleep, your metabolic rate drops, but it does not stop. On cold nights your body has to generate heat continuously just to keep your core temperature stable. If your calorie reserves are low when you get into the bag, your body does not have the fuel to keep the furnace running. You wake up cold at 3am and cannot figure out why.
A high-fat, high-carb snack before bed works well because both macronutrients provide sustained energy during overnight digestion. I usually eat a handful of nuts, a couple of squares of dark chocolate, or a peanut butter tortilla before I zip in. Not a full meal, just a 200 to 300 calorie bump. I notice a real difference on nights when I skip this step versus nights when I do not.
Step 7: Choose Your Campsite for Wind Protection, Not Just Views
Wind chill applies inside a tent if the wind is pushing through inadequately staked walls or through vents. Even a 10 mph wind against a single-walled tent or poorly tensioned rain fly will drop your perceived temperature significantly. When I scout a campsite I am looking for natural wind breaks: a ridge, a tree line, a rock face, anything that interrupts the prevailing wind direction. Low ground near a stream is often naturally sheltered but also collects cold air drainage at night, so I avoid canyon bottoms when temperatures are going to push below 35F.
Pitch your tent door away from the wind. Stake the rain fly out fully so it is not touching the tent body. Any contact between fly and inner tent creates a conduction bridge that transfers cold air directly to you. Tension matters. A sloppy pitch on a windy night is the difference between a comfortable night and lying awake listening to the fabric slap every thirty seconds.
Step 8: Vent Just Enough to Prevent Condensation Buildup
New campers close every vent and seal every door trying to stay warm. The result is a tent soaked with condensation by morning. Your breath and body heat release moisture into the tent air all night. Without ventilation that moisture condenses on the tent walls and drips back onto your sleeping bag. A wet sleeping bag loses a significant percentage of its insulating ability, even if it is down or synthetic fill rated for wet conditions.
Leave the upper vents cracked on cold nights, especially on the leeward side of the tent. You want airflow without direct wind entry. The goal is enough ventilation to carry moisture out before it condenses. In practice this means a vent opening about the size of your fist. It feels counterintuitive to leave a gap open in cold weather, but your bag will be drier and you will sleep better.
Step 9: Do a Bag-and-Pad Audit Before Every Trip, Not After
Sleeping bag insulation compresses and degrades over years of use. If your bag is five or more years old and has been stored compressed in its stuff sack, the loft has probably suffered. Pull it out and lay it flat for 24 hours before a trip. If it does not regain its original thickness, the insulation is damaged and the temperature rating is no longer accurate. A bag stored loose in a large cotton sack between trips will last significantly longer than one crammed into its compression sack year-round.
For the VENTURE 4TH bag I reviewed in depth at our long-term sleeping bag review, I store it in a large mesh laundry bag hung in a closet. It has held its loft well after two full seasons and dozens of uses. Also check your sleeping pad for slow leaks before every trip. An inflatable pad that deflates to half thickness overnight might as well not be there. Carry a small patch kit and inflate the pad at home to confirm it holds pressure overnight.
If you are shopping for a new bag right now, the VENTURE 4TH 3-season mummy is a solid starting point for most three-season camping in the continental US. It covers the 32F lower limit that handles most spring, summer, and fall trips from the desert southwest to the Northeast. Read the full long-term breakdown in our VENTURE 4TH sleeping bag review, or see why the mummy design outperforms rectangular bags for cold-night warmth in our piece on 10 reasons to switch to a mummy bag.
What Else Helps
The nine steps above cover the core system. A few extras worth knowing about: a sleeping bag liner adds 10 to 15 degrees of warmth for around $30 to $50 and takes almost no space. Chemical hand warmers placed in the foot box work like a hot water bottle for people who do not want to boil water at night. A ground cloth or footprint under your tent adds another thin insulation layer between the cold ground and your sleeping pad. None of these is essential, but all of them are cheap and lightweight. If you are planning a trip into shoulder season conditions where overnight temps will hover in the mid-twenties, stacking two or three of these extras on top of the base system is a reasonable insurance policy.
The right sleeping bag is the foundation of everything else in this guide.
The VENTURE 4TH mummy bag is rated to 32F, has a contoured hood for heat retention, and packs down to a size that fits inside most backpacks. With over 6,300 ratings and a 4.6-star average, it is one of the most trusted budget 3-season bags on Amazon. Check today's price and see which size fits your height.
Amazon Check Today's Price on Amazon →